
 posted 12-19-08 11:34 PM EDT (US)
In this little guide I will teach you the basics of the Men of the West(MotW)faction. Keep in mind that this is for 2.01 Rise of the Witch King, not 1.06 Battle for Middle Earth 2. I will first examine MotW in early game, mid game, and late game. I will also include heroes, units, and powers. Buckle up, it's going to be a bumpy ride!
The build order you will likely use the most is Farm >
MotW have many useful Palantir Powers, and multiple paths through them. One of the most commonly used is Rallying Call >

Rallying Call(5 pp): Essentially a Leadership ability, it gives troops you use it on +50% attack and armor. It is a very useful early game power, and can often turn the tide in an initial skirmish or be used to take out buildings in your opponent's base.

Summon Tom Bombadil(10 pp): This power summons the powerful hero Tom Bombadil. This is a very good power indeed. While he lasts, he is very tough, and can take a good amount of damage without dying. His sonic song ability is good at taking down clumps of weak units. He can often win a small battle for you, even if you're pretty heavily outnumbered. Watch out for archers, though. He becomes an instant target when summoned.

Summon Rohirrim(15 pp): This Palantir Power calls several battalions of Rohirrim to the battlefield. This is quite useful, use it when your men are being swamped with archers, or use them to take down enemy buildings, such as the fortress.

Earthquake(25 pp): This power is expensive, and you won't get a chance to use it in most games. However, when you do use it, use it wisely. It takes a long time to recharge. If you're using it against a fortress, always have the fortress in the center of the area effect, since damage decreases the farther it is from the nucleus.

Heal(5 pp): A useful but not awsome power for MotW. Heals all units in a certain radius and restores one unit per battalion. Although this is useful, don't have it as your first power. However, most players will get it somewhere along the road.

Rebuild(5 pp): An emergency MotW power. It restores a certain amount of health to all buildings in a certain radius. Again, like with Heal don't use it as your first power, and you should only use to to heal your Fortress of High-level buildings.
MotW early game isn't great, but isn't bad. They lack a dirt cheap spam-able unit, like Orc or Goblin Warriors, but they can still hold their own.

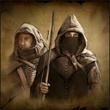
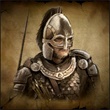
In all games, the main MotW infantry unit is the Gondor Soldier, trainable at a Level 1 Barracks for 250 resources. They're not the strongest or most powerful, but they are pretty tough and good all-around. Their Shield Wall ability (+25% armor, -40% speed) can be very handy when you're trying to hold off other infantry. Their strength is against pikeman, but they can also take down swordsman and light cavalry. Don't use them against archers unless you have no other option, though. Now let's get into MotW support units.

Rohan Spearmen: These are the basic pikemen unit for Men. They aren't the cheapest (300 resources), but they're tough, and can take a good amount of damage. Another nice thing about them is that they can keep up with soldiers and archers, unlike the MotW elite pikeman units, the Tower Guard. Use them against cavalry and buildings. When facing Elves, Angmar, another MotW, and sometimes Mordor you should probably build some of these soon. If you're playing against Dwarves or Isengard, you won't need them as soon.

Gondor Archers: Gondor Archers are MotW's first Archer unit. Trainable at a Level 1 Archery range for 300 resources, they're tough at range, but you should always have a swordsman or pikemen escort. These are one of the most useful MotW early game units, and you should build an archery range after you have a few battalions of Gondor Soldiers. Just be careful not to get them separated, they are very vulnerable to cavalry. Use them as support for cavalry and infantry.

Gondor Knights: Basic MotW cavalry unit. They're definitely not the best cavalry for late game, but early game they can pack a nasty punch. Use them in conjunction with Gondor Soldiers or Archers, you don't want them to get mauled by pikemen.
Early game heroes: MotW have multiple early game heroes that can all be useful, but two really stand out: Theoden(1200 resources)and Boromir(1250 resources).

Theoden is a great support hero. He gets Leadership on Level 1, and also Mount/Dismount, letting him back up cavalry or infantry. His Level 5 Glorious Charge ability can be very useful indeed. Just keep him protected though, he is weak by himself.

Boromir is perhaps the more used of the two. Although he has no Level 1 ability, his infamous Level 2 Horn of Gondor can be deadly when paired with archers. He also gets leadership at Level 5. He is tougher than Theoden, and can do some fighting on his own. He's a good addition when you're attacking an enemy's base, use him in conjunction with melee units, such as Gondor Soldiers of Knights.
MotW early game strategies vary, depending on the opponent and map. If you're playing a fast faction like Mordor or Goblins, you don't want to wait for the attack to come to you, take it to them. MotW are good at both offensive and defensive playing, and can switch from one to the other fairly quickly. If you're playing a tougher faction, like Isengard or Dwarves, you might want to go more on the defensive and not send your men in to their deaths. Elves are the biggest challenge when you're playing as Men, anything can happen then. Also, if you see Inns, CAPTURE THEM. They give you Dunedain Rangers, which are basically Ithilien Rangers, but half the price. They can really help with an early rush. Capture Outposts too, they provide a nice bit of income.
Mid game is when MotW start to shine. They have elite units in every category but swordsmen, and when you can get those out into play you might be able to turn the tide. Keep building farms though, the elite units can be big resource suckers if you don't have a good economy.

Tower Guard: MotW's elite pikeman unit. You can train them at a Level 2 Barracks for 450 resources. They're somewhat slow, and can't chase other units around the map, though. You might want to still use Rohan Spearmen as a temporary shield for your archers until the Tower Guard can make it. But when they do get into action, they are quite effective. Like all pikemen, they're tough, and can take down cavalry and buildings easily. But always have archers or cavalry with them, as other archers will shred them.
Ithilien Rangers: Some of the best Archers in the game, second only to Mirkwood Archers. They require 500 resources and a Level 2 Archery Range. They work best in groups, and can massacre pikemen and swordsmen. However, they have poor resistance to trample damage, and a few battalions of cavalry can wipe them out if you're not careful. Keep pikemen or swordsmen nearby. When equipped with Fire Arrows, Rangers are lethal.
Rohirrim: The ultimate cavalry unit. These guys are fast and tough, and they pack a pretty hefty punch. They can level most units, and can even switch between lances and bows. Keep them away from pikemen, and try to keep some archers nearby. If none are readily available, then try a little hit and run with their handy bows. Don't depend on this though, it's very hard to micromanage them effectively, especially when there is fighting going on elsewhere. It's better to let them do their work and then ride off, ready to come again when they're needed.

Knights of Dol Amroth: MotW's mini-hero battalion. At 1500 resources, they're fairly affordable, and well worth the price. Men already had great cavalry in vanilla BFME2, but this is just the icing on the cake. Knights of Dol Amroth are like Rohirrim, only faster and stronger. They maul archers and swordsmen, and they're awesome building destroyers. Three battalions can take down a fortress by themselves. They are also very effective anti-hero units. Use them wisely though, they're still weak versus pikemen, and you don't want to be continually reviving them.
Mid game upgrades: The main unit upgrade you'll be using in mid game is Fire Arrows. This can be researched at a Level 3 Archery Range for 1000 resources. It can then be equipped to archers and Rohirrim. It's a very useful upgrade, giving archers a big boost in attack and a substantial boost against buildings. Get it as soon as you can.
Mid game fortress upgrades: Probably the most useful MotW mid game fortress upgrade is the Houses of Healing. It lowers Hero revival cost and heals nearby units, much like the well. It can be useful if you're fighting a tough faction like Dwarves or Isengard (Or if you're outnumbered) and need to keep your units alive from fight to fight. Another good one is Banners, which gives Leadership to all units within a certain radius of the Fortress, much like a Heroic Statue.
However, to upgrade your Fortress you will need some extra resources laying around. If you beat down your opponent's defenses, build or upgrade your army and go in for the kill instead of adding stuff to your Fortress. Save the upgrades for when you're the one who's defenses are beaten down.
Mid game heroes:

MotW only have one good mid game hero, Aragorn. At 2000 resources, he's pretty affordable. He has numerous abilities, as well as a large attack and good armor. His abilities allow him to function as about any kind of Hero. His Athelas and Leadership abilities make him an excellent Support Hero, his Blade Master is very effective at killing other Heroes, and his Level 10 Army of the Dead power can wipe out armies. Use him well, and be aware that he is not invincible. Many new players use him on his own and wind up getting him killed. Don't let his great support powers go to waste.
Again, your mid game strategy depends on opponent and map. If you haven't been on the offensive early game, now is the time to build up some men and take the fight to your opponent's base, or his main army. Use your early game units (Such as Rohan Spearman and Gondord Archers) wisely, and don't send them on suicide missions to get rid of them. If you got them to a higher level, then they can still hold their own against tougher units. And as before, keep building farms, as you're going to need more resources and command points.
All games must come to an end sometime. Few games make it this far, but it's important to be prepared if one does. This is when you really need to start taking the offensive. Get out there and destroy some resource and producing buildings, upgrade your troops, and start pumping them out. If you haven't upgraded your Barracks/Archery Ranges then now is the time. If you're playing a faction like Mordor and can't beat your opponent's quantity of units, beat him in quality. If you're playing a faction like Dwarves and can't beat your opponent's quality of units, beat him in quantity. Just keep your head and manage your resources well and you should be okay. One very important thing is to protect your farms. If your opponent destroys a bunch of them, then you won't have the means to pump out expensive units, and you'll quickly crumble.
Late game heroes:

As with mid game, Men have only one late game hero, Gandalf, trainable for 3000 resources. He isn't that tough, but he has one of the best combinations of powers in the game. Most of his abilities are either meant for killing large amounts of troops (Wizard Blast, Lightning Sword, Word of Power), but his Istari Bolt power is very useful for killing heroes. Always give him some support, however. When his powers are recharging he's very vulnerable to attacks, and his rather slow speed makes it hard for him to escape. He's also not very good at demolishing buildings, as Aragorn is.
Late game upgrades: When the game is at a standstill, it's time for some upgrades. As with most factions, MotW have four basic upgrades: Better melee attack, better armor, better ranged attack, and better siege weapon attack. Two of these (Forged Blades and Heavy Armor) can be researched at the Blacksmith, the other two at the Archery Range and the Siege Works. The Blacksmith upgrades are well worth the cost, and you should get them even if there isn't a dire need for them. They help your troops stay alive longer, and thus they can level up faster.
Late game strategies: One of the biggest challenges can be taking down your opponent's fortress. If it's loaded with upgrades and extensions, it can be quite a pickle. Here are some strategies that may help.
Earthquake: One of the most useful Palantir powers at your disposal is the Earthquake. If you made it to late game you probably have one or more 25 power point abilities. Earthquake can destroy large amounts of units and buildings, and will half-kill an un-upgraded fortress. Use the power right around your opponent's fortress, and then send in your troops to finish it off. Hopefully you'll be able to take out a good amount of his men in the process.
Cavalry: MotW cavalry make very effective demolishers. When coupled with Theoden and his Glorious Charge power, a large amount Rohirrim can take down a fortress with great speed. Even if you don't have any Rohirrim on hand, you can use the Summon Rohirrim power to do the job. Knights of Dol Amroth are also quite useful, and if they make it to Level 7 they have their own Glorious Charge ability(Theoden's doesn't work on them).
Aragorn: Another method is to use Aragorn's Leadership and Blade Master abilities to destroy your enemy's stronghold. This isn't as commonly used as the others, but it can be quite effective. Aragorn's Athelas ability can also be of use in this situation.
There are several other methods, but I'll let you experiment with these and find out what works best for you. I usually use the Earthquake method if it's available. If you combine that and the Summon Rohirrim power, there isn't much your opponent can do.
Thanks for taking the time to read this (long) guide! I hope it helps you! I'll be adding more later, so stick around!
Nacht Jaeger - Ex AoEH Angel
[This message has been edited by Nacht Jaeger (edited 02-12-2009 @ 01:32 PM).]
