You must be logged in to post messages.
Please login or register

Game Modification & Editor Discussion

Hop to:    
loginhomeregisterhelprules
Bottom
Topic Subject: RTW Tutorial : Basic Modeling
posted 24 May 2008 20:45 EDT (US)   
Rome : Total War Basic Modeling

In this tutorial you'll learn how to make simple models from scratch in 3dsmax. We'll be making a custom short sword and a shield with a full texture (RTW ones are quad). finally (I havent added this part yet) you'll learn to UVW map your new items and then add them to existing RTW units.

If you've made a mistake but want to continue, or want to see my finished product you can download my max and texture files here.

Requirements:
--3dsmax, yes I know it costs 3.5 grand but unfortunately i don't know any other modeling program that can import .CAS files. Anyway, i wouldn't know how to use those other programs so this tutorial would be useless.
--Basic Knowledge in 3dxMax. You'll need basic knowledge of 3dsmax for this tutorial, check out Subrosa's tutorial to acquire the basics.
--Adobe Photoshop. Yes, you better be prepared to cough up the dough if you want to edit RTW.


PART I: Creating the Models

Step 1: Start off by opening 3dsmax and creating a cylinder, don't worry about the size, now click the tube tab and click on "Cylinder", give your cylinder these measurements. Finally, use the drop down menu and click "Editable Poly".


Step 2: We are now going to give it a curved shape, to do this, we'll move the vertices. Switch to top view and select these vertices:


Step 3: Move these up slightly. You've probably understood whats going on: once you've moved those up, select the circles inside the exterior one you just moved and move that up a bit, continue until you have this :


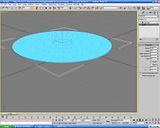
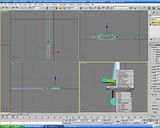
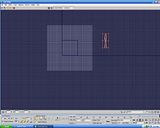
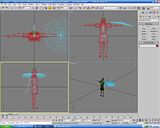
Now select the outer circle and move that down a bit, then switch to the Scale tool, and scale it in a bit, this will give it a nicer lip.

Step 4: You should now have something like this, a nice shield, right click on it and go into "Convert To: > Convert to Editable Poly".


Step 5: We are nearly done with the shield, the point of this shield is so that it will have a full texture because RTW takes a quarter of the textures and uses symmetry to duplicate the texture on the rest of the shield, thus, you could not for example, put a portrait of a god on it. All that is left is UVW mapping this shield. Later, I will show you how to add a texture to this shield inside your units texture.

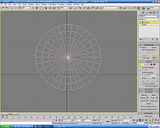
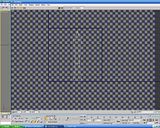
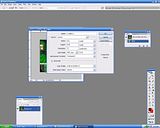
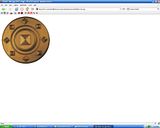
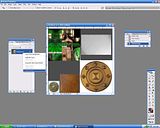
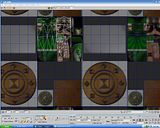
Go into the Drop down and select UVW Map, you'll get a rectangular plane, drag this down to the base of the shield:


Step 6: Once you've done this, right click on the model and convert it to an Editable Poly once again. Click again on the tube tab and select the drop down menu, this time select "Unwrap UVW Map".


Step 7: Click on the new bar that says "Unwrap UVW Map" and select "EDIT" in the menu below. You'll get a checkered screen with a wireframe image of your shield. When you are texturing your shield, you will put this wireframe model over the texture in your image file.


Step 8: Save your model as a max file, we'll use it later.

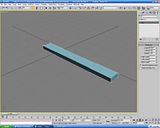
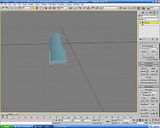
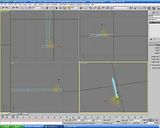
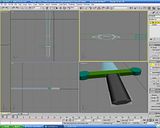
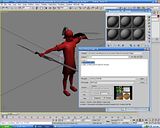
Now for the sword, the sword is much more complicated...because i added more detail, but its simple to make.

Step 9: Go to File > Reset, you should now have a new file. Start out by creating a box with these dimensions:


Then use the drop down menu and select "Edit Poly", this will allow you to move around vertices and such.

Step 10: Select these vertices and move them apart a bit (using the scale tool)


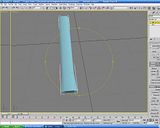
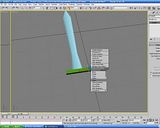
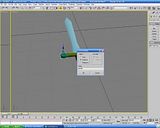
Now, on the side, select "Quick Slice" and make a cut right here:


Step 11: Drag a box around these 2 red dots, You must use a drag-box, otherwise it will only select that vertex, and not the ones behind it! and using the move tool move them up about halfway.


Step 12: Now drag a box around the top right vertex and click on the magnet icon, on the top bar, this turns on snaps. Using the move tool, snaps will let you position the vertex exactly on top of your bottom one:


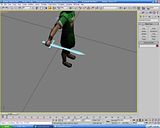
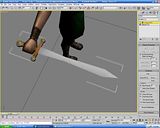
Your sword now has a sharp edge, don't worry so much about details, in game, you wont see them. You should now have something like this:


Step 13: To add a little variety to your sword, take those vertices you cut earlier and with the scale tool bring them closer together:


Step 14: Now to add the point at the end. Again using the "Quick Slice" tool, make a cut around here:

http://i92.photobucket.com/albums/l14/PvtClark_2006/ModelingTUT/20.jpg?t=1211671836

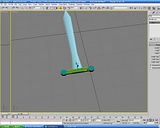
And, again with snaps, place all you verteces together to form a point, be sure to check all the angles, you might have missed one:


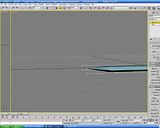
Drag a box around the tip, you should have several verteces there, click the "Weld" button, this combines them all into one vertex. Move this vertex to about the middle of the sword height, so it doesn't look like the tip is angled up. You should now have this:


Step 15: Now for the hilt. Create another box with the dimensions : Length 2, Width 12, Height 4. (I somehow cut off part of the image in Paint )


Step 16: Now for the decoration, add a cylinder about this size:


Clone this cylinder and place it in the other side:


you should have something like this:


Step 17: Time for the handle. Create a cylinder again and rotate it 90 degrees:


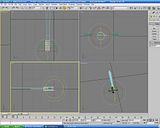
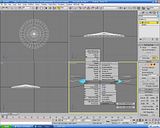
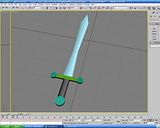
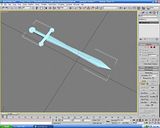
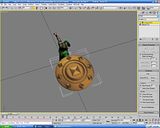
Edit it so that it has 6 sides, 1 height segments, and 1 cap segments. Drag a box around the upper half verteces and move them down to the level of the sword bar thing. Repeat with the bottom half. Scale the handle so that it fits nicely.


Step 18: Clone on the cylinder things and move it to the base of your handle, scale it to fit.


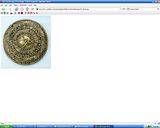
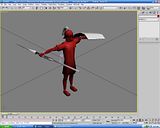
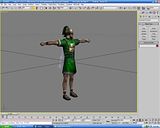
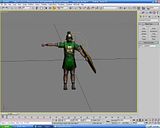
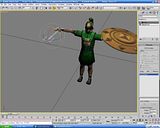
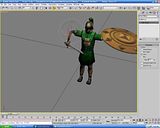
Here is your finished product:


Step 19: Convert everything to editable polys right (Convert to > Convert to Editable Poly). Now, select the blade and select "UVW Map", it should be fine the way it is, so convert it again to Editable Poly and then select "Unwrap UVW Map". You should get this:


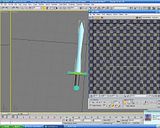
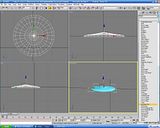
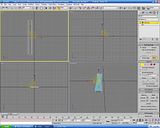
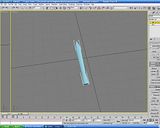
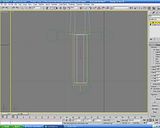
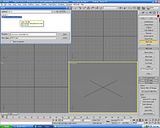
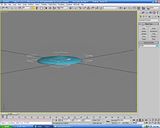
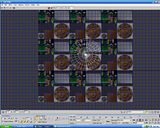
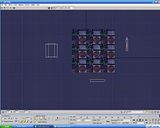
You've got some weird deformed thing, scale it into a shape like the sword blade, then drag it far from the center. This is because when you combine all the objects together to form the full sword, you'll have a mess of wireframe images, if you drag it away from the center however, they'll all be separated.


Step 20: Repeat with the 3 decorative cylinders, don't forget to drag them away from the center in different spots.

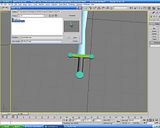
For the handle however, you'll need to edit the UVW map. When you click the "UVW Map" you'll notice that the plane isnt horizontal but vertical, right click on your handle and click "Gizmo" then rotate it 90 degrees and scale it so that it envelops the whole handle:


Step 21: Finally save your file. Part II will show you how to actually apply the textures and adding these to existing units.


******************PART II BELOW******************

[This message has been edited by PrivateClark (edited 05-25-2008 @ 01:43 PM).]

Replies:
posted 24 May 2008 20:50 EDT (US)     1 / 11  
If you've made a mistake but want to continue, or want to see my finished product you can download my max and texture files here.

PART II: Texturing and Adding them to the Game

Step 1: Start 3dsmax and open your sword file or, if you downloaded my max files, then open sword blade.max. Because i added this last minute in Part 1 i'm going to repeat, move each part away from the center in the UVW Map screen like so:


Now that everything has been set up its time to make your sword whole.

Step 2: Its time to attach the separate parts of your sword together. Select the blade and convert it to editable poly (right click>Convert To>Editable Poly), now go to the tube icon tab and click on Editable Poly. On the scrolling menu below, click "Attach" then click on all the other objects in the scene. This will join your objects, however the UVW Map will stay the same:


Step 3: Use the drop down menu again and now select "Unwrap UVW Map", you should now get a screen like this:


Step 4: For this tutorial, I've decided to add my new weapon and shield to a Hastati. Now its time to fetch the Hastati model and texture. Navigate to your RTW folder and get this model :


and this texture:


Step 5: Open up Adobe Photoshop, its time to edit the texture. Now, you'll notice that the hastati texture is relatively small and awfully cramped up, there isn't any space to put in a full shield texture. However, I've noticed several BI textures that are 512x512:


Step 6: Create a new document with these dimensions:


This will give all the extra room we need 
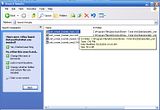
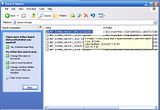
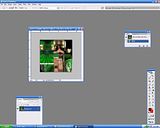
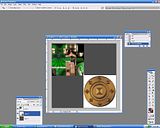
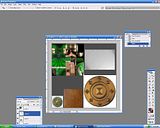
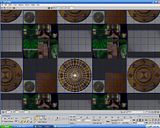
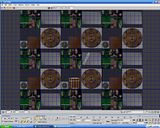
. Now, Fill the background with gray and then drag and drop the hastati texture onto this new document and place it in the corner. DO NOT RESIZE IT.


Step 7: Now to take care of the Alpha Channel, click on the channel tab on your new texture and create a new alpha channel named Alpha 1, fill it completely in white. Now in the original Hastati texture go to the channels tab and click on the alpha layer, drag a box around the whole thing and copy paste it onto your alpha channel layer, then move it to the corner where the hastati is, should fit perfectly.


Step 8: Now for the actual textures, because im not very good at it and i'm semi-lazy, i'm going to use the Internet. Open Firefox/IE go to google, and type in "Roman Shield". Use this one.


Copy-paste it and resize it so that it fits like this:


For decorative cylinder things, i'm using these:


For the leather handle:


And finally for the blade:


Copy paste these / resize these so that they fit nicely into your texture:


For the DDS exporter to recognize this texture(you'll get an error message otherwise) select all your layers and "Flatten the Image" (right click>flatten image). They are all now merged:


Save your texture as "Custom_Unit2.tga.dds".

Step 9: Back to 3dsMax. Import the Hastati model, if you don't know how, check out SubRosa's 3dsMax basics tutorial.


You should now have this:


Step 10: Time to texture this guy. Press "M" to open up the Material Editor, select a blank sphere and give it your new texture, again, if you don't know how to texture, read SubRosa's tut.


Step 11: You should now have something like this:


*Gasp!*. Not to Worry! all you need to do is edit the UVW coordinates. First off, delete the shield and the sword, we'll be replacing those anyway, right click on the pila and click hide, we'll get to it later. Now select the body and Unwrap its UVW. You'll get something like this:


Select all the wireframe object things and hold CTRL and resize them to fit your texture.


Repeat with the pauldrons and plume. In the end you should have:


Step 12: Now go to "File>Merge" and select your shield, you'll notice the shield is MUCH bigger than your unit so resize it accordingly and place it on top of his hand.


Step 13: Time to give it its texture. Apply the texture in the material editor and discard the Unwrapped UVW map you already made, create a new Unwrapped UVW Map and now you should have this:


Resize your shield wireframe and place it like so:


If there is white on the borders just shrink your wireframe thing a bit.


Step 14: To make the shield move with the body in the drop down menu select "Skin" then underneath add "bone_lhand".


Step 15: Now for the sword. Use Merge again and add the sword to the model, resize it and position it like this:


Step 16: Apply the texture to your sword and then Unwrap the UVW Map, you'll get something like this. The circle are those decorative things, that cylinder thing is the handle, the blade shape is...the blade and the rectangle is the thing between the blade and the handle.


Place them / resize them like so:


You now have this:


Step 17: Again use the skin modifier except this time select "bone_rhand":


Now rename your sword "secondary_weapon"

Step 18: Unhide your pila and Unwrap the UVW map, resize it so that it fits correctly.

Step 19: Go through all the objects in the scene and make sure that the skin modifier is on top, if it is below the Unwrap UVW modifier, simply drag and drop it above. If you don't do this, the exporter will give you an error and your CAS file will be corrupted.

Step 20: Save your model as a max file and then Export your file as a Cas:


There you go, you've successfully edited an RTW Model and added your own models to it.

INGAME:


Well, I know the shield texture isn't so good and the shield needs to be shrunk and the little separator between blade and handle I forgot to get a texture for so i gave it leather, but you get the idea

[This message has been edited by PrivateClark (edited 05-25-2008 @ 01:40 PM).]

posted 24 May 2008 23:36 EDT (US)     2 / 11  
Outstanding!

You know, if you can just email me your articles in a text file with the pictures attached, and I will code them and put them up on the main site.
posted 25 May 2008 00:13 EDT (US)     3 / 11  
I'm looking forward to part two. I'm really weak on the textures part of the process, learning how to put those in without changing the existing models would just be fantastic. Would also speed up the eventual release of my modern military units considerably.

I have some more guns to make ... probably the only hidden downside to making models is that once you start you don't want to quit until it's absolutely perfect.

Time to fight! Time to die! Time to win!
posted 25 May 2008 01:49 EDT (US)     4 / 11  
Outstanding!

You know, if you can just email me your articles in a text file with the pictures attached, and I will code them and put them up on the main site.
Thanks 
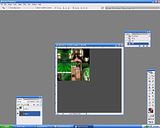
What do you mean? Like a word document with the pictures already inside? or a .txt document with the pictures attached in the e-mail?
I'm looking forward to part two. I'm really weak on the textures part of the process, learning how to put those in without changing the existing models would just be fantastic. Would also speed up the eventual release of my modern military units considerably.
Yeah, had to take a break from all the copy-pasting of image links
posted 25 May 2008 12:07 EDT (US)     5 / 11  
A Word doc or a text file would be fine. But if you do it in Word make sure that you do not use any of Word's special characters, like their smart quotes or apostrophes. I have to remove thing like that because they do not display correctly on the site. Just put all the pictures in a zip file and attach it to the email. I will host them in our Gallery.

With your permission I will put part 1 on the site.
posted 25 May 2008 12:28 EDT (US)     6 / 11  
sure, go ahead, ive just finished the pictures for part 2 so il have that part up in a bit, and il make a text file for you.
posted 25 May 2008 13:40 EDT (US)     7 / 11  
posted 26 May 2008 11:12 EDT (US)     8 / 11  
Sorry for the Triple post, but SubRosa, i just sent you a txt document with all the pictures attached, hopefully that will help?
posted 26 May 2008 13:51 EDT (US)     9 / 11  
Yes, I received it. Although you sent me more pictures than you are actually linking to in the articles.

I have part 1 finished. I ought to have part 2 done today and will then get both up and newsied.
posted 26 May 2008 15:08 EDT (US)     10 / 11  
yeah, i realized that many of the pictures weren't needed so i didn't add them, but there all still in the folder.
posted 26 May 2008 17:07 EDT (US)     11 / 11  
Thank you for the excellent tutorial. I feel like I learned something.

Time to fight! Time to die! Time to win!
Total War Heaven » Forums » Game Modification & Editor Discussion » RTW Tutorial : Basic Modeling
Top
You must be logged in to post messages.
Please login or register
Hop to:    
Total War Heaven | HeavenGames